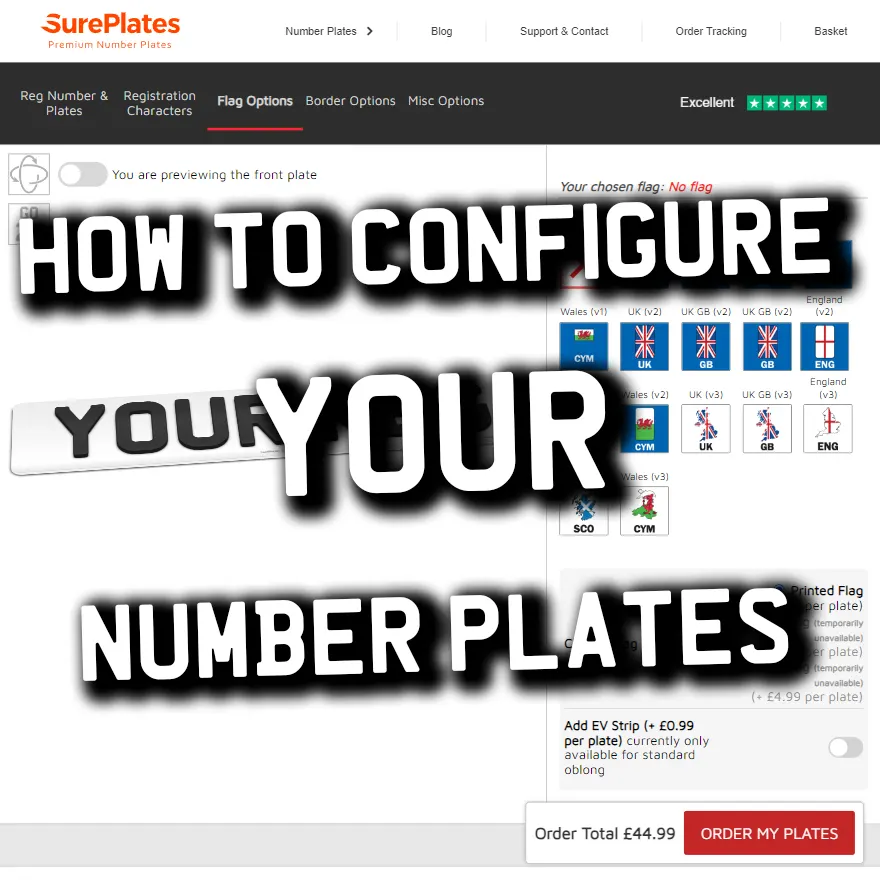
This article is out of date and only applies to our legacy plate builder. We have a new plate builder as of March 28 2024.
This article aims to guide you through using our plate builder. We’ve put together a comprehensive and powerful plate builder that you can use to configure your number plates. It’s pretty self-explanatory and most users don’t require any help using it. However, if you’re confused about any of the options or need some help configuring your 4D plates, this guide is for you. From entering your registration number to choosing the perfect style and border for your plates, we’ve got you covered. Let’s dive in and explore the various options available to make your number plates truly stand out!
Tab 1 – Enter Your Registration Number & Choose Your Plate Size
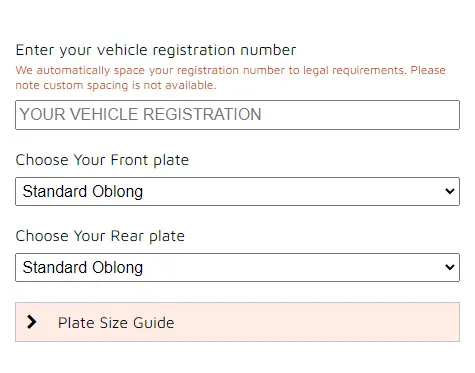
Reg Number
The first thing you’ll need to do is enter your registration number in the “your vehicle registration” box.
You can enter your registration number in any format you like. Our system will automatically adjust the spacing of your number to match the legal requirements. For example, you could enter “A B 7 3 C D E”, and the website will automatically adjust this to “AB73 CDE”.
Plate Sizes
Next, you’ll need to choose which size you’d like for the front & rear plates. Currently available sizes are:
- Standard UK oblong
- 4×4 Square
- Oversized oblong
If you’re unsure what size you need, measure the plates on your vehicle and compare them with the sizes listed below:
| Plate | Size (mm) | Size (in.) |
| Standard oblong | 520 mm x 111 mm | 20.4” x 4.3” |
| 4×4 square | 280 mm x 204 mm | 11” x 8” |
| Oversized oblong | 533 mm x 152 mm | 21” x 6” |
If you only need a single plate, you can choose either “No Front Plate” or “No Rear Plate” as needed. The price will reduce by 50% for singles.
Tab 2 – Choose Your Character Style
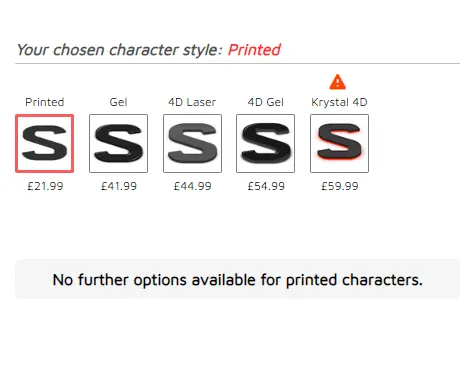
On the next tab you can pick the plate style you’re looking for. The “plate style” refers to the type of character you want, for example 4D characters or printed characters.
If you’re unsure what the differences between each character styles are, see our article comparing the various character styles. Here’s a brief description of each:
Printed Characters
These are the standard number plates you see on most vehicles. The characters are printed on with a black thermal wax ribbon to ensure proper black values. Printed characters are the cheapest option. The characters are printed onto a reflective vinyl film which is then laminated to a piece of acrylic.
Gel Characters
The next character style option is gel, commonly known as “3D gel number plates” or simply “gel plates”. These digits are made of polyurethane doming resin, the same as gel stickers or badges. Polyurethane resin is suitable for long-term outdoor use, does not turn yellow or change colour in the sun, and is very durable. Gel digits are backed with a high-strength adhesive and are bonded to the surface of the plate.
4D Characters
Next on the list of available characters is 4D. A 4D character is made of acrylic and is available in a thickness of either 3 mm or 5 mm. These digits are laser cut from sheets of black acrylic (which is pre-laminated with adhesive) and are bonded to the surface of the plate. 4D digits are sharper and more defined than gel digits and are equally durable.
4D Gel Characters
Finally, we have 4D gel. These digits are a combination of 4D and gel, with a gel character simply being bonded to the top of a 4D one. The size of each character is controlled by regulations, and the font is exactly the same for both, so it’s easy enough to place a gel digit on top of a 4D one, creating a rounded, gel cap. This character style offers the thickness of 4D, with the smooth, glossy appearance of gel.
Tab 3 – Choose A Flag
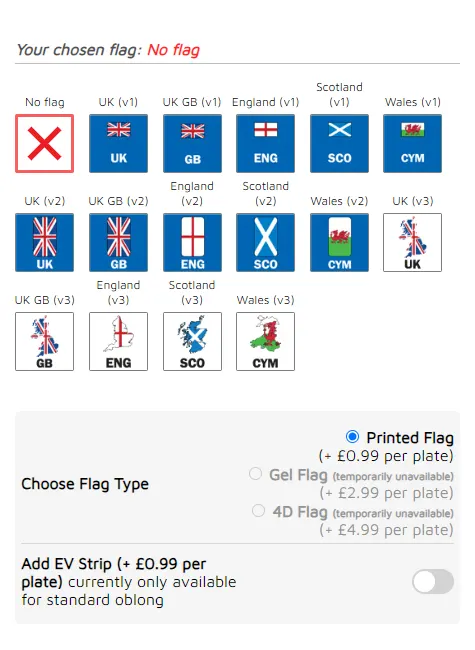
If you’d like to add some colour to your plates, here’s where you can do that. Various flags are available for you, including the UK, English, Scottish, and Welsh flags.
The flags you can display on your plates are controlled by regulations. The rules allow any of the 4 flags above to be shown, but no others. This is why we cannot print custom flags or personalised graphics in place of a flag. Each flag is accompanied by the corresponding country code. For example, if you choose a Welsh flag, the country code “CYM” will be displayed underneath.
To provide a little variety, we have made several of versions of each flag.
Flag Version 1

Version 1 flags are oblong-shaped flags that are contained inside a blue flash of a contrasting colour. The flag is horizontally aligned as it would be in the real world.
Flag Version 2

Version 2 flags are the vertically aligned counterparts to version 1, where the flag is lengthened to take up the height of the remaining space and is also contained inside a blue flash.
Flag Version 3

The final versions available (at time of writing – 18 July 2023) are a little more creative. These flags are cropped inside of an outline of the corresponding country, making the shape of the country the body of the flag. There is one for each country in the United Kingdom.
Green Flash
Additionally, a green flash is available for those who want to display their zero-emissions status. The green flash can be added to your number plates and can be combined with any flag but can only be installed on a vehicle that has no tailpipe emissions.
Tab 4 – Choose Your Border
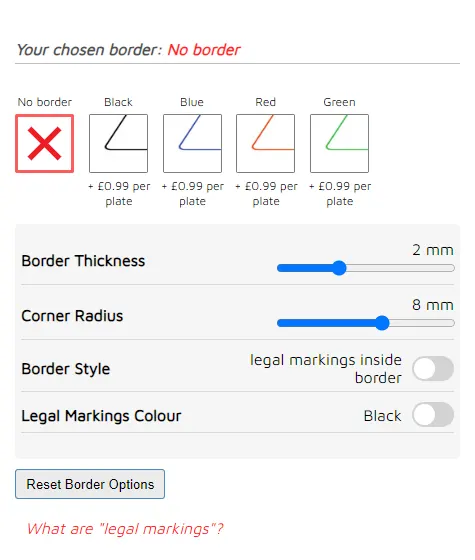
The final option available for your number plates is a border. There are 4 colours to choose from, including black, red, green, and blue.
Border Thickness
You can adjust the thickness of your border using the slider controls on the border tab. A border can be adjusted from 1 mm to 4 mm in thickness.
Border Radius
Additionally, you can adjust the corner radius of the border as well. Using the slider control, the corner radius of the border can be adjusted from 5 mm to 10 mm.
Border Style
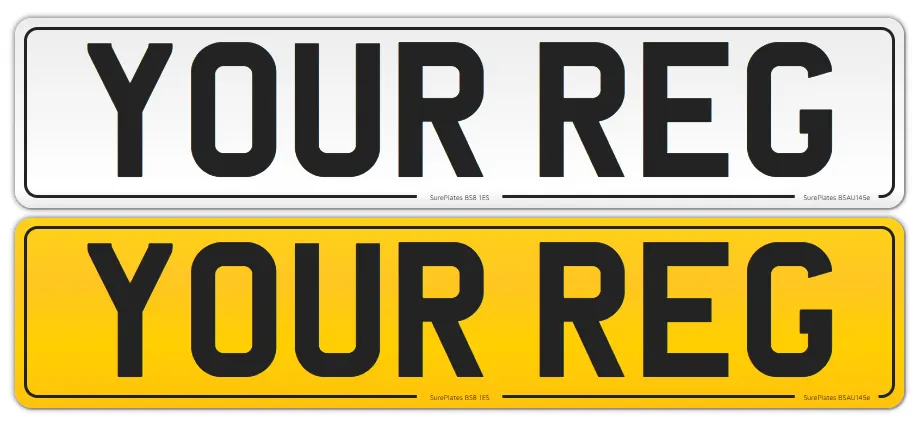
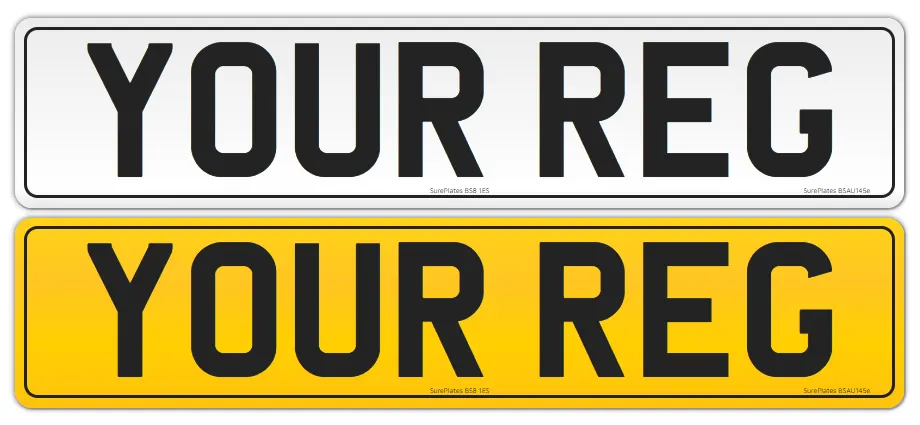
Next, you can adjust the “border style”. This option lets you choose where you want to position the legal markings – either above the border stroke, or in a gap on the border stroke path. Here’s some screenshot to explain what this option does:
Markings Inside Border:
Markings Above Border:
Markings Colour
The final option in the border tab allows you to decide on what colour you want the markings to be. You can choose to have the markings the same colour as the border, or you can choose to keep them black.
Tab 5 – Misc. Options
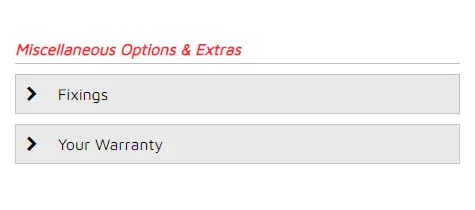
In the misc. options tab, you’ll see various options that are not directly related to your number plates. For example, there’s an option to extend your standard 2-year guarantee for life. There’s also an option available to include your fixings.
As we expand our services and offer more, the misc. tab will contain more options. For now, this one is of limited use.
Summary
Our 4D plate builder is intuitive and user-friendly, and while you shouldn’t need any help using it, this guide offers a brief overview of the steps and available options. The only required option are your registration number and at least one plate, everything else is optional.
Because of the number of options and configurations available, our builder can create 10s of thousands of unique configurations of number plates so you can truly personalise and customise your plates.
Your registration number will be spaced to the road legal requirements automatically, so you don’t have to worry about entering it incorrectly or making a mistake. Happy customising!
